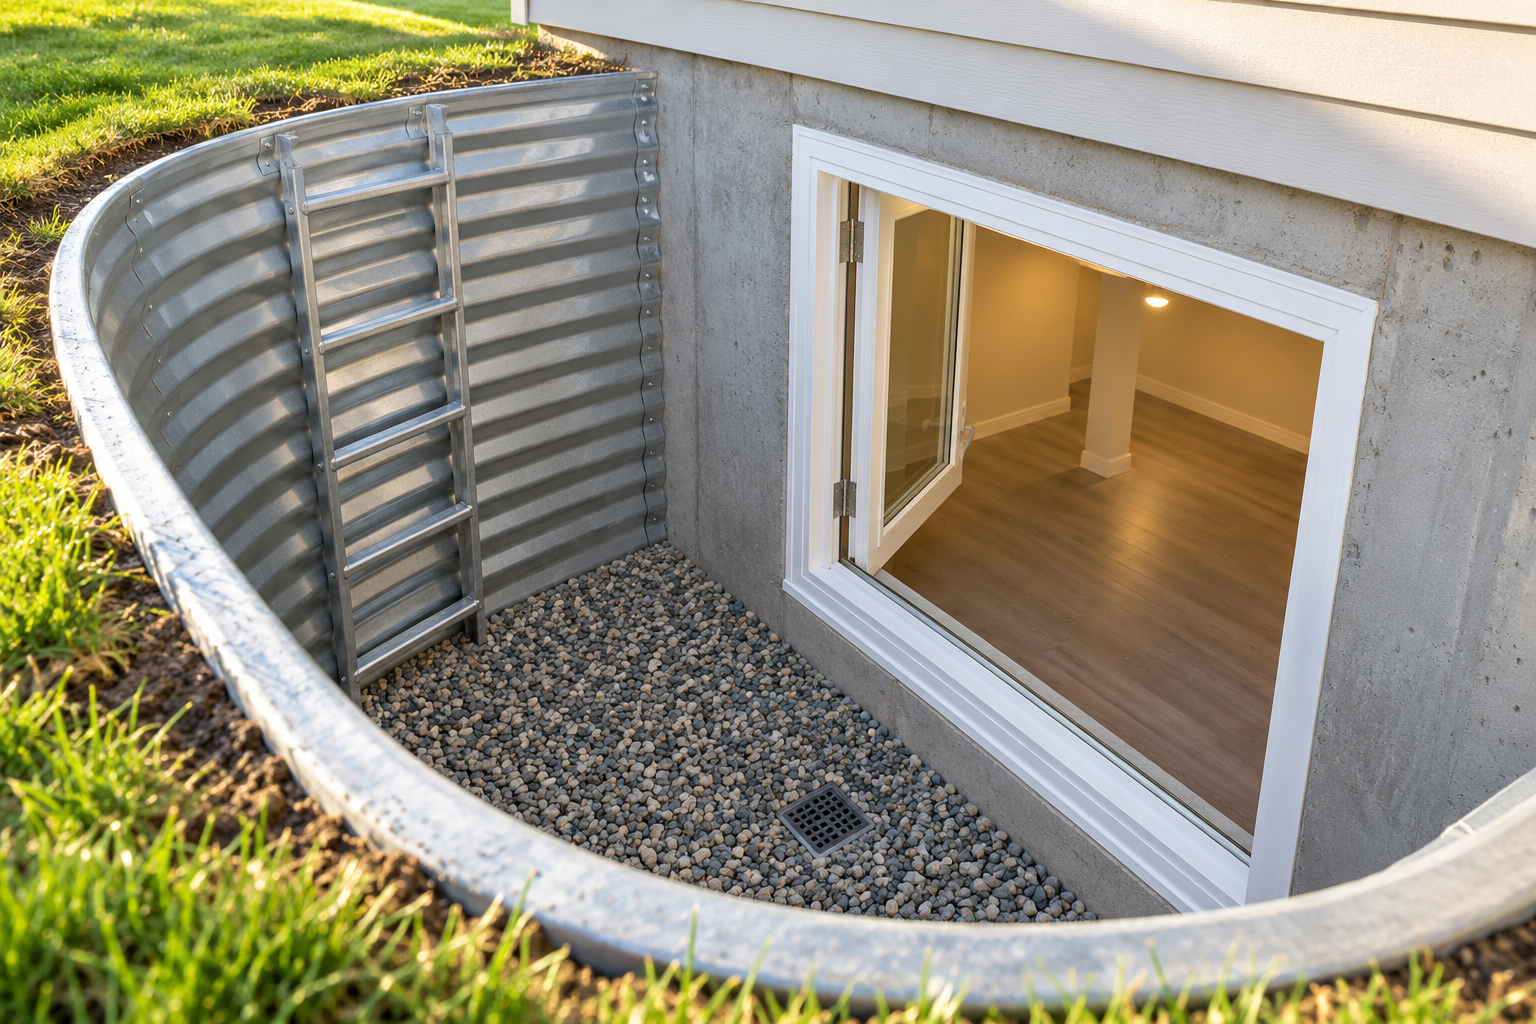
Egress window installation cost depends first on the work your basement needs. Replacing a window in a suitable existing opening is a different project from excavating a well and cutting a new opening through the foundation.
For initial planning, HomeGuide publishes an average installed range of $6,000–$8,000, with complex projects exceeding $10,000. These are published estimates, not a guaranteed quote for your home. Confirm whether the quoted scope includes a new opening, excavation, structural support, drainage, permits, and restoration.
Your first decision: are you replacing an existing escape window, enlarging a small basement window, or creating a completely new opening?
Once that is clear, this guide helps you check opening dimensions, compare complete proposals, and send installers the same written scope request. Start with the project table below; if you already have quotes, go directly to the comparison section.
What does the advertised installation price actually cover?
Three projects can all be described as “egress window installation,” even though they involve very different work.
| Your starting point | What needs checking | Why the price changes |
|---|---|---|
| An existing compliant opening and usable well | Replacement window, installation details, existing drainage and current approval requirements | Less excavation or foundation alteration may be needed |
| A small basement window that must be enlarged | New opening dimensions, structural support, well enlargement and drainage | Existing glass does not mean the opening is suitable |
| A solid foundation wall with no window | Location approval, excavation, foundation cutting, support, window, well and complete drainage scope | You are creating an opening and exterior escape space |
A real example of the difference: The Egress Window Company in Minnesota advertises a $3,195 standard vinyl package including a well, ladder, permit, and installation labor and materials. Its price requires a suitable existing 35-inch opening; new openings cost extra, and additional fees may apply.
That is a regional advertised offer, checked October 11, 2026—not a national price or a quote for your property. The listed scope does not settle every drainage or restoration question.
Do not average that offer with the cost of a completely new foundation opening. First establish which project each price describes.
If you are replacing ordinary windows elsewhere in the house, use our window replacement cost guide to compare that separate scope.
What should your complete project budget include?
Ask contractors to mark each item as included, excluded, or an allowance. An allowance is a budget amount that may change; ask how the final charge will be calculated.
| Work item | What a useful proposal should specify |
|---|---|
| Site assessment and approvals | Proposed location, room use, permit responsibility and inspections |
| Structural work | Foundation material, opening dimensions, support details and any required engineering |
| Excavation and access | Equipment access, hand digging, protection of nearby surfaces and soil removal |
| Window | Manufacturer, exact model, operating style and documented clear opening |
| Window well | Product, dimensions, attachment, ladder or steps, and cover if supplied |
| Drainage | Where water goes, connection or approved alternative, and how existing conditions will be checked |
| Water protection | Installation details around the new opening and treatment of disturbed foundation waterproofing |
| Finishing | Interior trim, drywall and paint; outside backfill, grading and landscaping |
| Handover | Debris removal, inspection records, warranties and operating demonstration |
This checklist is a comparison tool, not a prescription for how to construct the opening.
Do not add generic online component prices to an installed package without checking for overlap. Excavation, disposal, or permits may already be included. Otherwise, your budget can count the same work twice.
For a personal budget, use:
Written contract price + priced exclusions + applicable taxes not included + a separately held contingency.
Base the contingency on unresolved site conditions discussed with the installer. It does not replace a defined drainage or structural scope.
Which site conditions deserve attention before you accept a quote?
Photograph both sides of the proposed opening before the site visit.
Outside, show access gates, downspouts, utility equipment, paving, nearby structures, and the slope of the ground. Inside, show pipes, wires, wall finishes, and the intended room layout.
These photographs help contractors identify questions; they do not replace an inspection.
Access and restoration
Ask where equipment will enter and where excavated material will go. Establish whether a fence panel, patio, shrub, or walkway must be removed and who reinstates it.
“Backfill included” does not necessarily mean the lawn, paving, or planting will be restored.
Foundation condition
Ask whether the proposal assumes a particular wall material or condition. If cracks, movement, or uncertain construction are present, establish who assesses them before cutting begins.
For example, Boulder County specifically requires engineering design and/or inspection for egress foundation cuts. Requirements elsewhere vary. Confirm the applicable process with your building department.
If existing structural concerns need separate investigation, consult our foundation repair cost guide.
Utilities
Confirm who arranges the before-you-dig request through 811 and follows the state’s response and waiting procedures. Ask separately whether privately owned buried lines require additional locating.
A contractor should explain the excavation plan before equipment arrives.
What size must an egress window opening be?
The important measurement is the net clear opening: the unobstructed space available when the window is opened normally. It is different from the glass size, frame dimensions, and rough opening cut in the wall.
The City of Anoka’s sizing chart summarizes commonly used requirements:
| Measurement | Common requirement to verify locally |
|---|---|
| Net clear opening area | At least 5.7 square feet; qualifying grade-floor openings may use 5 square feet |
| Clear opening width | At least 20 inches |
| Clear opening height | At least 24 inches |
| Bottom of opening above finished floor | No more than 44 inches |
These are a starting point. Ask the building department which adopted code, amendments, and existing-building provisions apply to your project.
Why a 20-by-24-inch opening is too small
Width and height minimums must be satisfied alongside the required area.
For a rectangular unobstructed opening:
Clear width in inches × clear height in inches ÷ 144 = clear area in square feet.
| Illustrative clear opening | Calculated area | Meets a 5.7-square-foot area requirement? |
|---|---|---|
| 20 × 24 inches | 3.33 square feet | No |
| 24 × 36 inches | 6.00 square feet | Yes, for area only |
| 30 × 28 inches | 5.83 square feet | Yes, for area only |
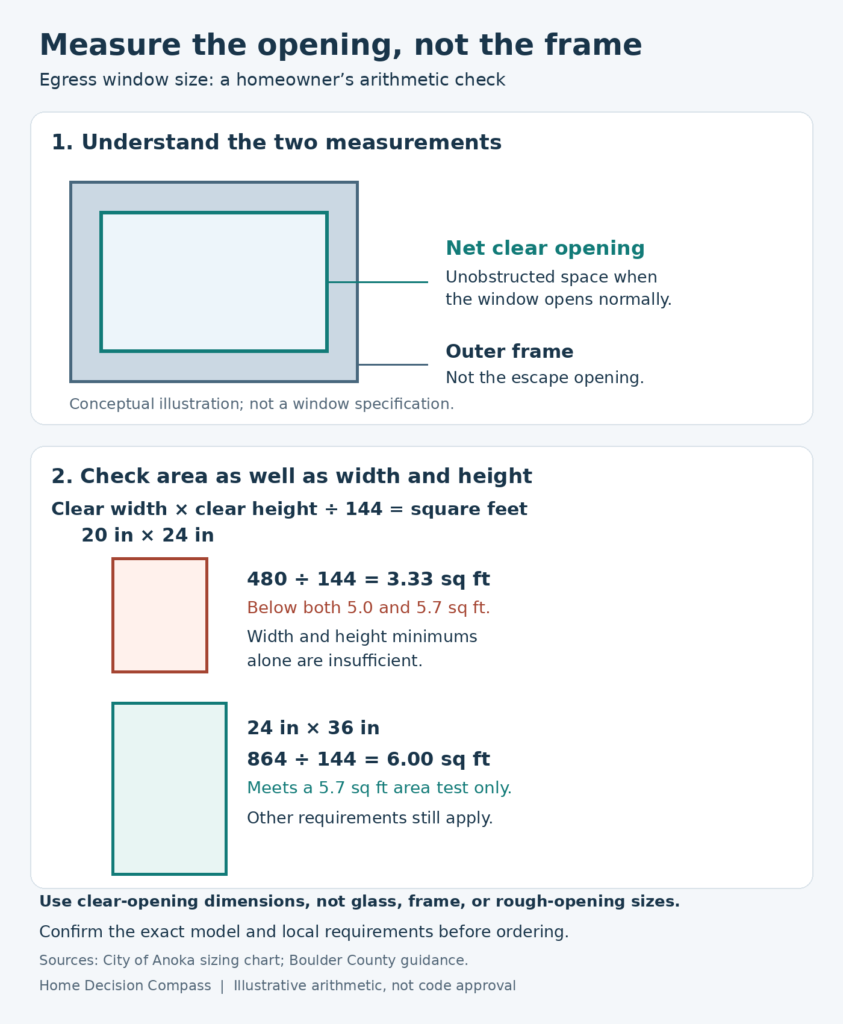
These examples are arithmetic checks, not approved window specifications. A window can satisfy the area calculation and still fail another requirement.
Before ordering, obtain the manufacturer’s clear-opening information for the exact model, size, and hardware. Have the proposed installation checked through the applicable approval process.
Do not assume that a product advertised as “egress” qualifies in every size or installation.
Does the window well allow someone to escape?
A window well holds soil back and provides space outside a below-grade opening. Its usable dimensions and the window’s operation must work together.
Duluth’s residential guidance specifies a minimum 9-square-foot well area, with at least 36 inches of width and projection. It also calls for permanently attached escape access in wells deeper than 44 inches. Confirm your local requirements.
Have the installer explain:
- Whether the window opens fully within the proposed well.
- Whether the escape access remains usable with the window open.
- Whether a deck, porch, or other obstruction affects the route out.
- How any cover releases from inside.
Boulder County’s guidance requires covers and similar devices to be removable or releasable from inside without a key or tool. A weather cover must preserve escape access.
The purchase decision should consider the whole route: room, opening, well, and onward path outside.
Where will water in the well go?
This is a question to resolve before signing.
A proposal saying “gravel included” tells you about a material. It does not identify the drainage destination.
Boulder County’s published guidance describes connection to the building’s foundation drainage system, with a specified exception for qualifying well-drained soils. Duluth’s guidance describes drainage to drain tile or daylight. These illustrate why the approved solution must match the jurisdiction and property.
Ask the contractor to explain:
- The proposed drainage route and destination.
- What existing drainage will be located and assessed.
- What happens if that system is absent, damaged, or unsuitable.
- How any change will be priced and approved.
- What maintenance access will remain.
Ask for photographs of concealed drainage and water-protection work before backfilling, where safe and compatible with the inspection process.
If the basement already leaks, assess that condition alongside the window project. Our basement waterproofing cost guide explains the separate scope to discuss.
How do three contractor quotes compare?
The following scenario and prices are fictional teaching examples. They are not contractor bids or market averages.
Assume one new below-grade opening. The same window and standard well, documented drainage, permit handling, disposal, and agreed restoration are required. Quote C adds an optional upgraded well and cover.
| Proposal | Advertised total | Total for comparable scope |
|---|---|---|
| Quote A: essential items excluded | $5,600 | $7,950 |
| Quote B: agreed scope included | $7,200 | $7,200 |
| Quote C: agreed scope plus optional upgrade | $8,000 | $7,200 if the $800 upgrade is removed |
Quote A: price the missing work
In this example, the contractor later prices the excluded items as follows:
| Excluded item | Additional price |
|---|---|
| Defined drainage work | $1,100 |
| Permit handling and fee | $250 |
| Disposal | $350 |
| Agreed restoration | $650 |
| Total additions | $2,350 |
$5,600 + $2,350 = $7,950.
Quote A becomes $750 higher than Quote B after its missing work is included.
Quotes B and C: separate essentials from preferences
Quote B includes the agreed scope. Quote C includes that scope plus an optional $800 upgrade. If the contractor confirms the upgrade can be removed for an $800 credit, its comparable price is also $7,200.
This does not identify a winning contractor. Compare structural details, product specifications, warranties, payment terms, and site assumptions before choosing.
When an essential item is unpriced, mark the total “unresolved.” Do not count an exclusion as zero dollars.
Our contractor hiring guide helps with references, insurance, written terms, and contractor checks.
Send this request to each installer
You can adapt this message so every contractor receives the same starting information:
Please quote one basement egress window project at the location shown in my photographs. The intended room use is [describe use]. Please inspect the site and specify the exact window model and clear opening, foundation alterations and required support, window well and escape access, drainage destination, water protection, permits and inspections, disposal, and interior and exterior restoration. Identify exclusions, allowances, taxes, optional upgrades, and conditions that could change the price. Please also explain the payment schedule, warranty, and who is responsible for approval and inspection completion.
Attach photographs and an approximate access-gate width. Leave structural measurements and final specifications to the appropriate professionals.
Five companies and suppliers to research
These are reference starting points, not a ranking or endorsement. Product suppliers and installation contractors have different roles.
| Company | Role and useful starting point | What to verify |
|---|---|---|
| The Egress Window Company | Regional installer with published package scopes | Service address, existing-opening assumptions and extra charges |
| The Real Seal | Chicagoland contractor discussing egress installation | Current site-specific pricing; its older cost article says prices may have changed |
| The Great Egress Co | Egress window product supplier | Exact specifications, delivery terms and who installs the product |
| BILCO | Window well product manufacturer | Suitable system, local supply and installation responsibility |
| RockWell | Window well product manufacturer | Dimensions, escape features, cover compatibility and local availability |
A manufacturer’s product warranty is different from an installer’s workmanship or water-intrusion warranty. Ask who handles each type of claim.
What should you check before the project is closed out?
Use this checklist during handover:
- The installed window model matches the agreed specification.
- The installer demonstrates normal opening, closing, and locking.
- The opening, well, escape access, and cover are checked through the required approval process.
- Concealed-work photographs and the drainage explanation are supplied as agreed.
- Interior finishing, disposal, grading, and restoration match the contract.
- Required inspection records and correction items are resolved.
- Written warranties identify the responsible company, coverage, exclusions, and claim process.
- The installer explains maintenance and whom to contact if water appears.
Coordinate payment milestones with the written contract and applicable local rules. Do not sign a completion statement saying unfinished work is complete.
After handover, keep the escape route clear and follow the product and drainage maintenance instructions.
Frequently asked questions
Does an egress window make my basement a legal bedroom?
It addresses one part of the approval process. Room use may also involve ceiling height, ventilation, heating, alarms, and other local requirements. Obtain approval for the intended use rather than relying on the window installation alone.
Can I install a window and add the well later?
Have the installer and building department review the complete arrangement first. Below-grade escape access and drainage belong in the planned scope; separating them can leave unresolved safety and water-management issues.
How long does installation take?
The Real Seal describes one to three days for installation, depending on the work. Its guidance is not a schedule guarantee. Product delivery, permits, engineering, inspections, weather, and restoration can extend the overall project.
Will the installation increase my home’s value?
Potential value depends on your market and the approved use of the space. Avoid budgeting on a guaranteed resale return. Safety, approval, drainage, and installation quality should drive the decision.
Can I save by buying the window myself?
Possibly, but agree on the exact product with the installer before ordering. Establish responsibility for measurement, freight damage, unsuitable products, returns, and warranty coordination.
Your next step
Prepare a small project brief before requesting prices:
- State the intended use: bedroom, recreation room, or another purpose.
- Photograph the location: inside, outside, and the equipment access route.
- Confirm the approval process: ask the building department about permits, structural documents, and inspections.
- Send the same request to installers: use the message above and ask them to inspect the site.
- Resolve the essentials: opening specifications, structural work, drainage, and completion responsibilities must be documented before signing.
Keep the quote comparison and completion checklist with your project records. They help you evaluate both the proposal and the finished work.
Sources and further reading
Sources checked October 11, 2026. Published cost estimates and regional offers are planning references, not guaranteed 2026 prices. Municipal guidance applies within its jurisdiction and illustrates questions to verify locally.
HomeGuide — published installed cost benchmark
The Egress Window Company — regional package pricing and conditions
City of Anoka — egress opening sizing chart
City of Duluth — residential window well checklist
Boulder County — emergency escape and rescue guidance
811 — before-you-dig information
The Real Seal — project explanation and dated cost guidance
The Great Egress Co — product information
BILCO — window well systems
RockWell — window well products